
This article was originally published by a www.houzz.com . Read the Original article here. .

This article was originally published by a www.houzz.com . Read the Original article here. .
![]()
Whether popping popcorn, reheating pizza slices, softening butter or melting chocolate, your microwave does heavy-duty work day in and day out. And that also means heavy-duty grime and food odors. Over time, all that exploded food mess can make your microwave less efficient. The good news is that we have a fast and easy way to get your microwave back to just-out-of-the-box clean, or almost there. Here’s how to clean a microwave.
Your first line of defense is to prevent the problem in the first place, according to Evelyn Carpenter at the Whirlpool Institute of Home Science. Covering what you’re microwaving goes a long way toward preventing most spots and splatters.
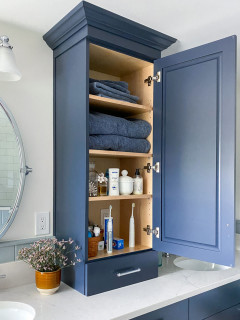
Find an interior designer near you
Carpenter also suggests cleaning the inside of your microwave as part of your daily kitchen routine. Using a soft cloth, sponge or paper towel, wipe down the inside ceiling, floor, sides and tray. This removes any spatters that might have escaped containment before they have a chance to harden.
Shop for a microwave oven on Houzz
If the splatters are caked on, try steam before you apply elbow grease. Using a microwave-safe container, heat about 1 cup of water on high for two to three minutes. Let it sit for up to five minutes, then carefully remove the water (it will be hot) and the turntable. Wipe down all the surfaces with a soft cloth, sponge or paper towel.
How to Speed-Clean Your House
Follow up by using white vinegar as a natural disinfectant. Dip a microfiber cloth in a 50-50 water-vinegar solution, wring it out until it is slightly damp and use it to wipe down the surfaces. In most cases, this will be enough to leave your microwave’s interior sparkling. If there are still some splatters, just repeat the process.
Take a Vacuuming Master Class for a Spotless Home
Clean the turntable you removed earlier. Almost all turntables are dishwasher-safe, but if you’re not sure about yours or you doubt your microwave could be out of commission for the length of a dishwasher run, you can clean it with warm water and dish soap.
Wipe the rubber gaskets with a damp cloth too. A damp cloth is also a good choice for wiping down the glass door, but if the door is very greasy, use a 50-50 water-and-white-vinegar solution or glass cleaner. For a polished look, wipe everything dry with a soft, dry cloth.
New to home remodeling? Learn the basics
Carpenter recommends steam-cleaning the microwave’s interior once every week or so, but this method works even if you go longer between cleanings. And if you’re vacuuming your refrigerator vents, do your microwave vents at the same time. Your microwave will appreciate it.
More on Houzz
Read more cleaning guides
Browse kitchen photos
Find design and remodeling pros
Shop for home products
This article was originally published by a www.houzz.com . Read the Original article here. .

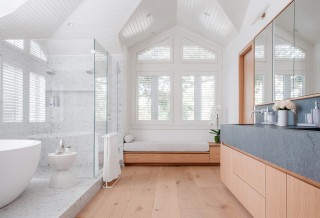
Lighting is often called the jewelry of a room, but given its functional importance, especially in a bathroom, that analogy might be selling it a bit short.
One easy way to improve the functionality, safety and look of a bathroom through lighting is to add hidden LED strips. They can be placed under toe kicks, shelves and cabinets, boosting ambient light during the day and providing soft illumination at night. Waterproof versions can illuminate your shower niche or threshold, improving visibility. The strips can be hardwired by an electrician, but they’re also available in plug-in and rechargeable versions.
Some light fixtures are designed to be virtually invisible. The rest, including your vanity sconces, should work hard and also look great. The easiest approach is to keep your new sconces in the same locations as the old ones, but if your vanity sconces are overhead, you may want to hire an electrician to move them to either side of your mirror. This will provide more even lighting and an up-to-date look.
Tip: Be sure to check whether fixtures are damp- or wet-rated and to adhere to local code when replacing or moving fixtures.
Your Guide to Perfect Bathroom Vanity Lighting
Tell us: What small updates made a big difference in your bathroom? Share in the Comments.
More on Houzz
Read more stories about bathroom design
Find a bathroom remodeler
Shop for bathroom products
This article was originally published by a www.houzz.com . Read the Original article here. .

It can be surprising how much plastic we use in the landscape. There are those single-use black pots that garden center plants come in, for example, as well as plastic seed trays, plant labels and twine.
But with a little thought, you can replace these unsustainable items with more environmentally friendly alternatives. Use wooden labels and traditional garden string, and seek out garden centers that will recycle the black plant pots. Also, hunt around for biodegradable seed trays that will break down into the soil when they reach the end of their lifespan.
When you’re planning outdoor structures such as greenhouses, opt for glass instead of plastic if possible. The initial cost may be higher, but a model glass will last a lot longer than a cheaper plastic one.
This article was originally published by a www.houzz.com . Read the Original article here. .
A subtle and simple way to give your kitchen a fresh look is to replace the cabinet handles and knobs. You can make a traditional kitchen feel a bit more contemporary by opting for a sleek, modern pull, for example, or a sterile-feeling kitchen feel warmer with brass or wood. If the new hardware has different dimensions than the old hardware, just add backplates to cover the previous holes. Whatever you choose should be durable, feel comfortable in your hand and be properly proportioned for your cabinetry (no dinky pulls for wide, heavy drawers, please!).
If you’re concerned about having to change out your plumbing fixtures, appliances and lighting to match your new hardware, rest assured that mixing those metal finishes is not only OK but recommended by many designers. When in doubt, stick to a single color and finish in each category. For example, designers often choose stainless steel and chrome for plumbing fixtures and appliances but opt for unlacquered brass for the cabinet hardware. That said, given how high-touch and visible a faucet is, if yours is just “meh,” consider upgrading it to a beautiful new model anyway.
How to Mix and Match Your Kitchen Cabinet Hardware
Shop for knobs and pulls
This article was originally published by a www.houzz.com . Read the Original article here. .

It’s a rare living room that doesn’t call for an area rug. Even in a carpeted room, an area rug helps to define a seating area and make a room feel complete. So if you don’t already have an area rug, or the one you have doesn’t reflect your current taste, this is a good opportunity for a refresh.
If you’re trying to make a formal living space feel more casual, consider a flat-woven or natural-fiber rug (such as jute). Tufted rugs with asymmetrical patterns or high-low textures are good bets if you’re looking to add a contemporary element to your room. Color-wise, light colors tend to make a room feel larger while darker colors make it feel more cozy. And the busier the patterns of your other textiles, the simpler your rug can be, and vice versa.
At least as important as the style of your rug is its size. A common recommendation is that all of the legs of your furniture — or at least the front legs of your seating — should be on the rug. If you love your current rug but it’s too small or irregularly shaped, you can layer it on top of a larger one. Natural-fiber rugs or solid, neutral-toned wool rugs are often good, affordable choices as base layers. A small, vibrant but well-worn antique Persian or Moroccan rug can look gorgeous over a large jute rug, for example.
All of that said, the “perfect rug” isn’t a specific size or style. It’s the one that most appeals to you and fits your lifestyle and budget.
11 Area Rug Rules and How to Break Them
Shop for an area rug
This article was originally published by a www.houzz.com . Read the Original article here. .

Display any leftover holiday decor or seasonal ingredients — pine cones, string lights or ornaments that didn’t make the tree — into clear class containers, apothecary jars, cloches or cut crystal bowls. Place the containers on a bar cart or anywhere else you could use a little holiday decoration.
Tip: To fill a cloche, place all of your baubles in the upside-down cloche, put a piece of cardboard over the opening, flip over the cloche, place it on the table and carefully slide out the cardboard. Use the same technique in reverse to empty it.
This article was originally published by a www.houzz.com . Read the Original article here. .


![]()
In most kitchens, the dishwasher is conveniently located next to the sink to simplify loading. When laying out your space, also think about the ease of unloading clean dishes and flatware. Consider where you’ll be standing when the dishwasher door is open and how easily you’ll be able to access drawers and storage.
Since emptying the dishwasher is a frequent task, convenient access to storage should be a priority. I have seen several kitchens where an open dishwasher door blocks access to storage for dinnerware and flatware. Other kitchen layouts require walking across the room to put away dishes. Also make sure there’s plenty of space to stand at the sink when loading the dishwasher.
This article was originally published by a www.houzz.com . Read the Original article here. .


When designing this Norwood Township, Michigan, home for a retired couple with a large extended family, architectural designer Stephanie Baldwin of Edgewater Design Group took to heart the homeowner’s inspiration images of traditional Shingle-style homes and created something worthy of a Nancy Meyers movie. The welcoming front porch has an arched roofline echoed by the arched front door, the columns have real stone veneer at their bases and the bay on the right has a copper standing-seam roof.
To ensure that the lakeside home could survive the harsh climate and blowing sands from the Lake Michigan shoreline, Baldwin specified low-maintenance exterior materials, including vinyl shake shingles for the siding. Zip sheathing on the north- and west-facing sides of the house adds extra insulation and waterproofing.
This article was originally published by a www.houzz.com . Read the Original article here. .

Replacing bland window treatments with elegant draperies or shades makes any room look finished. But the right window treatments can do much more, including dampen sound, provide insulation, block light and enhance privacy — all critical in a bedroom. If yours are failing in any of these regards, think of an upgrade as an investment in your well-being.
Sheer curtains can be layered over a roller or cellular shade for privacy and light control. Thick or lined draperies don’t necessarily need to be layered, but if you go without, swap your straight rod and finials for a French return curtain rod, which bends all the way to the wall, to block more light. Similarly, if choosing Roman shades, you’ll have less light leakage if you select an outside mount shade than an inside-mount design.
That said, while we need darkness to fall (and stay) asleep, the morning sun is helpful for waking us up. Blackout shades can disrupt that natural cue. If you need them, one solution is to install smart shades that are raised automatically at a designated time in the morning.
Which Window Treatment Should You Choose?
What to Know About Curtains and Drapes